centos7.6部署搜图bot
1.安装go-cqhttp
1.首先从cq项目下载适合的cq,项目地址:
[Mrs4s/go-cqhttp: cqhttp的golang实现,轻量、原生跨平台. (github.com)](https://github.com/Mrs4s/go-cqhttp/tree/master)
2.配置go-cqhttp
1
2
3
4
5
6
| # 新建目录
mkdir cq
cd cq/
#上传go-cqhttp到该目录下
#运行cq
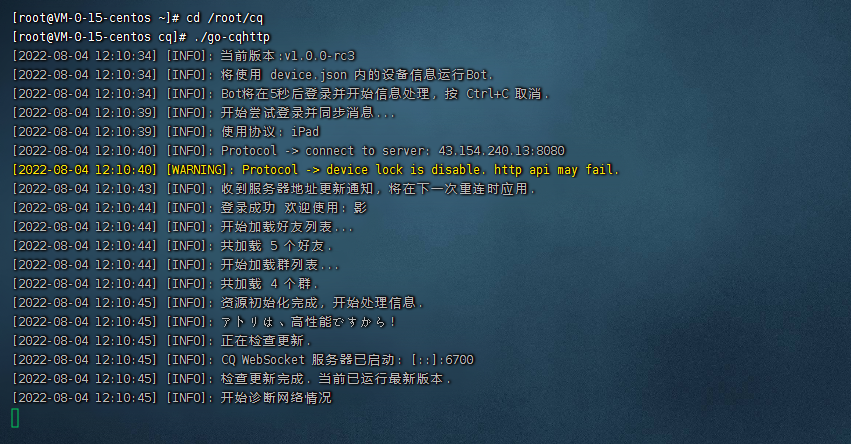
./go-cqhttp
|
3.修改go-cqhttp的配置文件config.yum
添加正向WS
1
2
3
4
5
6
7
8
9
10
11
12
13
14
15
| # 连接服务列表
servers:
# 添加方式,同一连接方式可添加多个,具体配置说明请查看文档
#- http: # http 通信
#- ws: # 正向 Websocket
#- ws-reverse: # 反向 Websocket
#- pprof: #性能分析服务器
# 正向WS设置
- ws:
# 正向WS服务器监听地址
address: 0.0.0.0:6700
middlewares:
<<: *default # 引用默认中间件
# 反向WS设置
|
修改完毕,使用 ./go-cqhttp运行cq
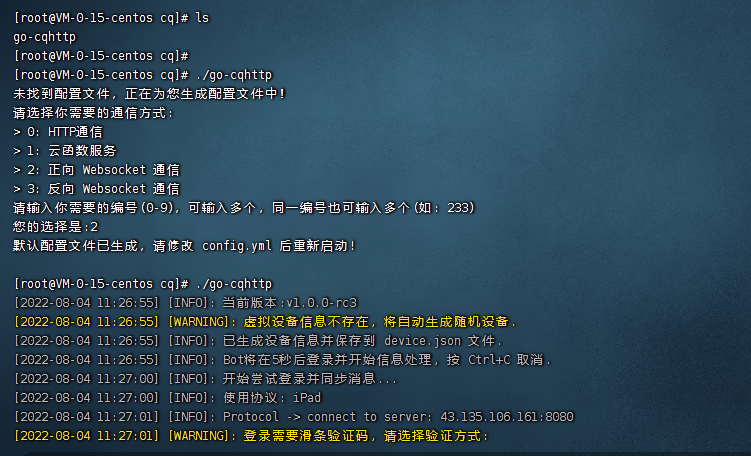
登录选项用1和2都行,最好是同网络下扫码登录,可以直接解账号风控
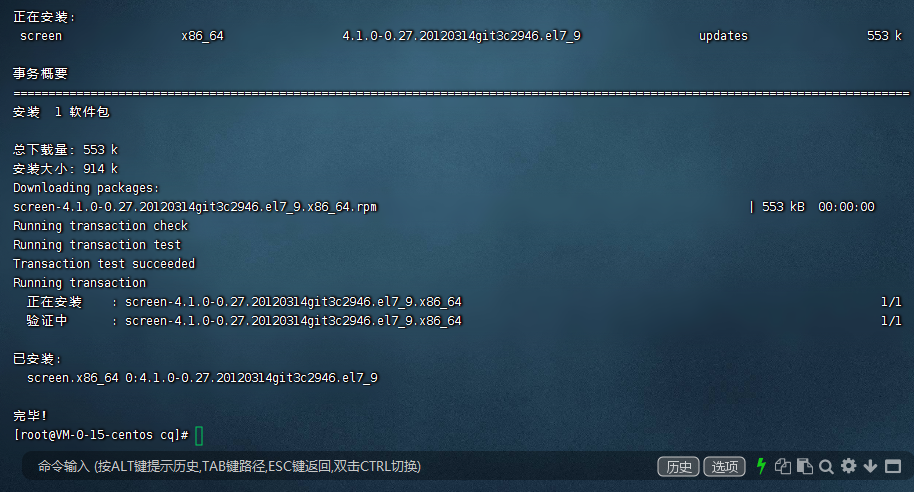
2.安装screen
yum install screen -y
3.安装cq-picsearcher-bot
项目地址:
[Tsuk1ko/cq-picsearcher-bot: 🤖 基于 saucenao / ascii2d / whatanime 的搜图机器人 (github.com)](https://github.com/Tsuk1ko/cq-picsearcher-bot)
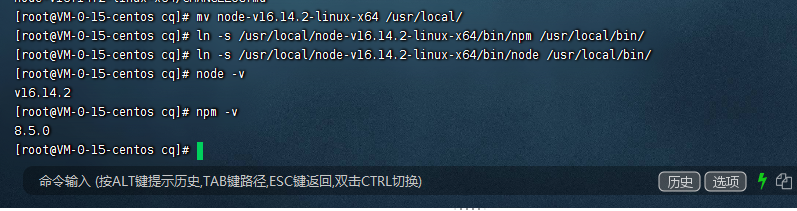
1.安装组件node.js
1
2
3
4
5
6
7
8
9
10
11
12
13
| # 下载压缩包
wget https://nodejs.org/dist/v16.14.2/node-v16.14.2-linux-x64.tar.xz
# 解压下载完毕的压缩包
tar -xvf node-v16.14.2-linux-x64.tar.xz
# 将解压出来的目录移动到/usr/local目录下
mv node-v16.14.2-linux-x64 /usr/local/
# 配置node.js
# 创建软连接
ln -s /usr/local/node-v16.14.2-linux-x64/bin/npm /usr/local/bin/
ln -s /usr/local/node-v16.14.2-linux-x64/bin/node /usr/local/bin/
# 查看配置是否成功
node -v
npm -v
|
2.部署cq-picsearcher-bo
部署过程示例:
1
2
3
4
5
6
7
8
9
10
11
12
13
14
15
16
17
18
19
20
21
22
23
24
25
| git clone https://github.com/Tsuk1ko/cq-picsearcher-bot.git --depth=1
cd cq-picsearcher-bot
cp config.default.jsonc config.jsonc
# 安装依赖(选择下列其中一种方式即可)
## (1) 一般情况下
npm i
## (2) 更推荐使用 yarn
npm i -g yarn
yarn
## (3) 如果在国内部署,可以像这样设置使用淘宝镜像再 install
### (3.1) 使用 npm
npm config set registry https://registry.npmmirror.com --global
npm config set disturl https://npmmirror.com/mirrors/node --global
npm i
### (3.2) 使用 yarn
npm config set registry https://registry.npmmirror.com --global
npm config set disturl https://npmmirror.com/mirrors/node --global
npm i -g yarn
yarn
|
注意此处(第三行)是将 config.default.jsonc 复制一份,重命名为 config.jsonc,然后编辑 config.jsonc 文件来配置本程序,不可以删除 config.default.jsonc 或直接对其改名
配置文件说明
配置完成后先启动 go-cqhttp 再运行本程序
初次尝试部署建议直接使用npm run test命令直接前台启动,可以直接看到运行日志,如果有错误能方便地查看报错日志
修改配置后无需重启,可以使用配置热重载指令
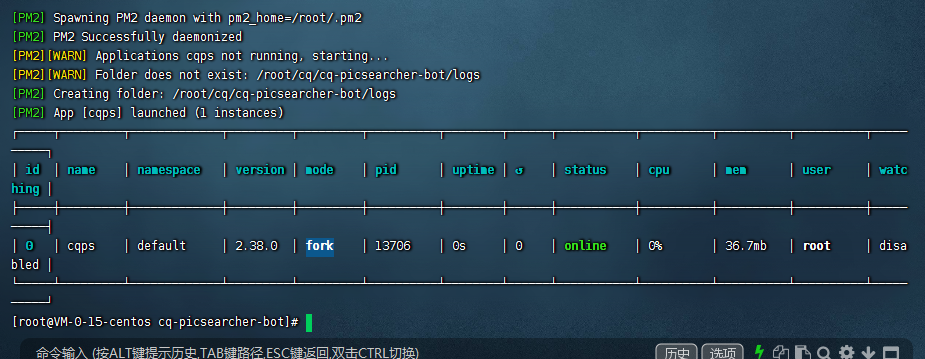
确保使用上述命令执行没有发生错误后,结束前台进程,再使用下述后台守护方式运行
1
2
3
4
5
6
7
8
9
10
11
12
13
14
| # 运行
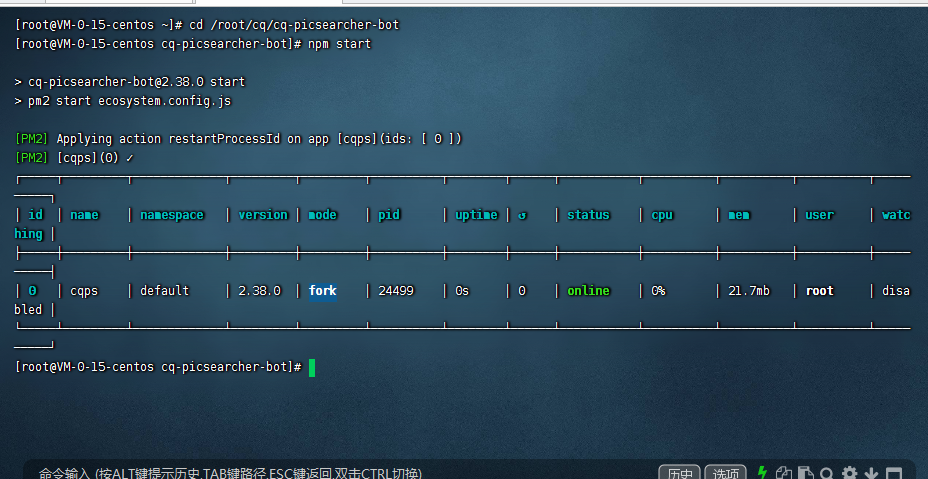
npm start
# 停止
npm stop
# 重启
npm restart
# 查看日志(平时日志也会保存在 logs 文件夹内)
npm run log
# 停止 pm2 进程
npm run kill
|
3.使用screen运行bot和go-cqhttp
先运行cq
1
2
3
| screen -S qq
cd /root/cq
./go-cqhttp
|
再运行搜图bot
1
2
3
| screen -S setu
cd /root/cq/cq-picsearcher-bot
npm start
|
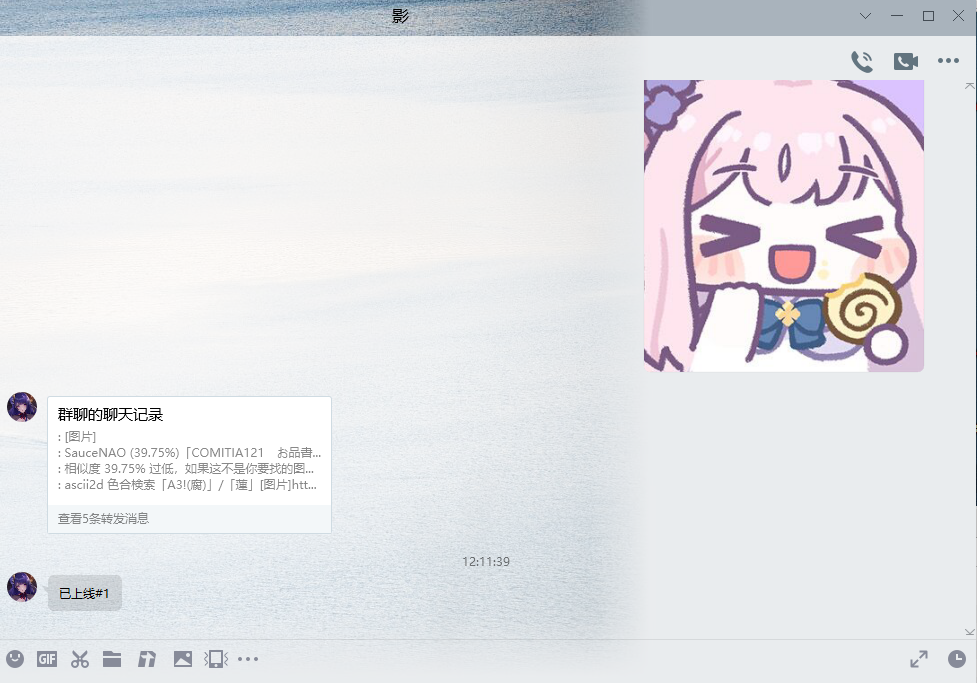
好耶 可以搜本子了~~~
 wechat
 qq
qq